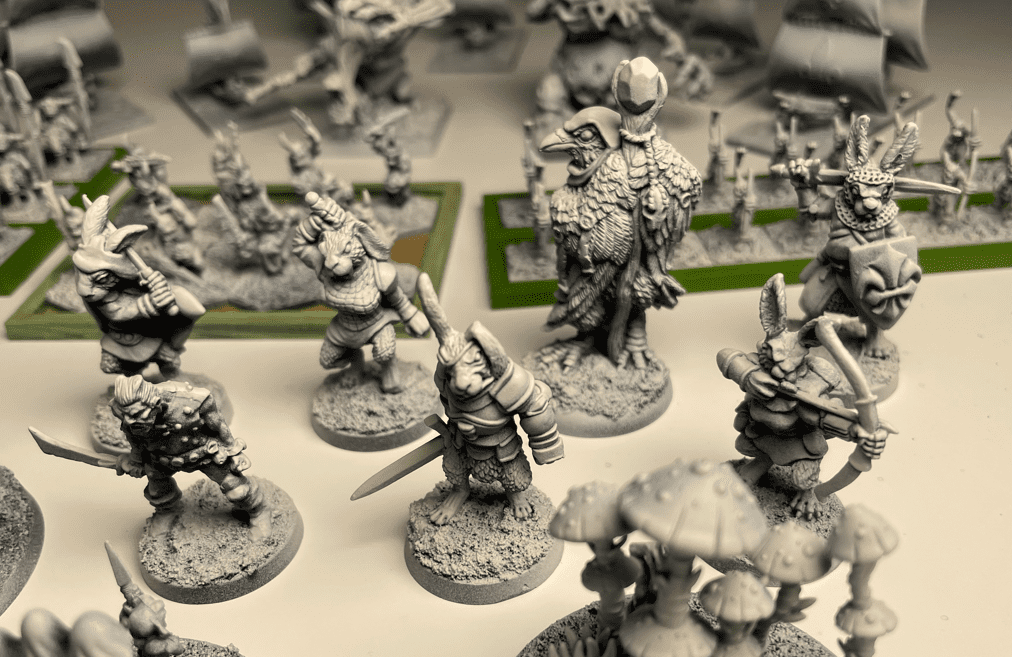
In the lead-up to introducing some magic into our Hobgoblin battles, I’ve added some magic users and bodyguards.
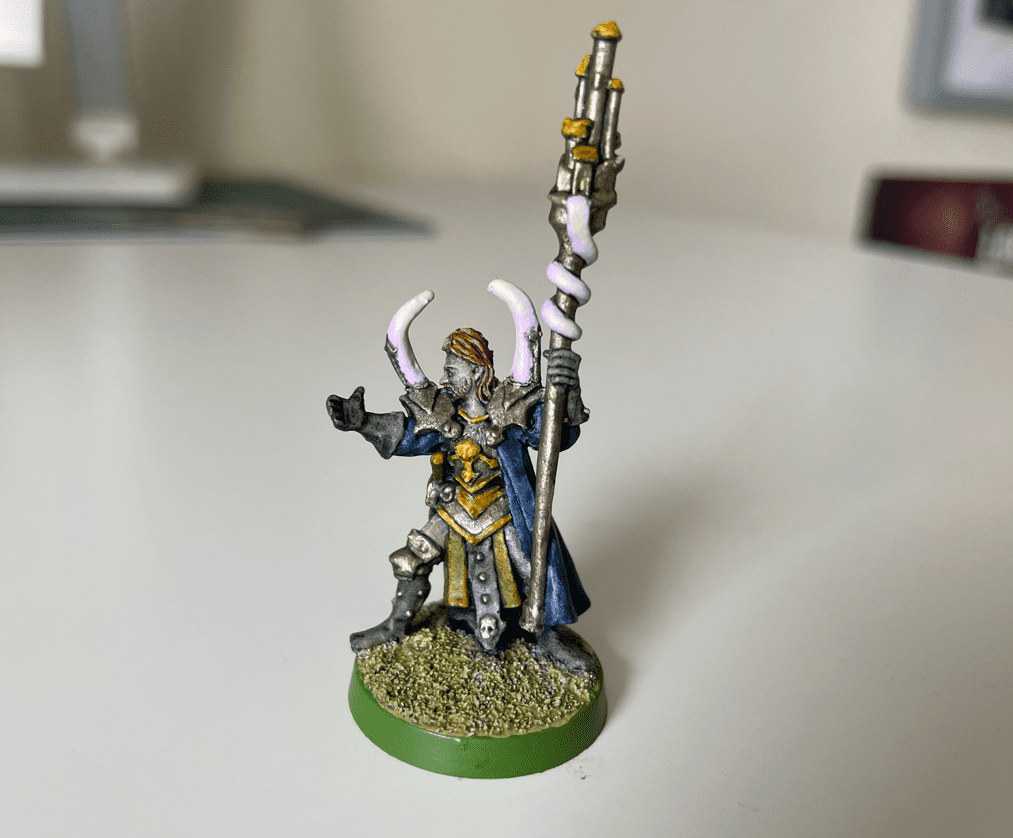
All came from Ral Partha. Here’s witch elf sorcerer May Hem. Ably backed up by a characterful Kev Adams daemon, she’ll be blasting out spells for Baron Gibb’s Chaos warhost.
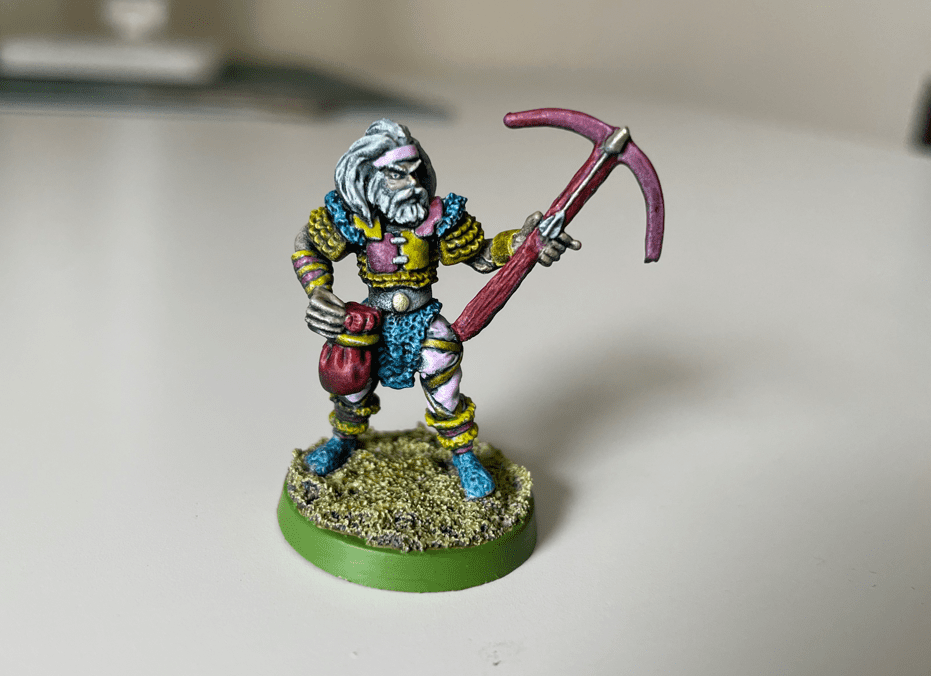
Then there’s Jeff’s dad, a human wizard who’ll join The Order of the Morning Glory alongside his valiant bodyguard, Sir Loin.
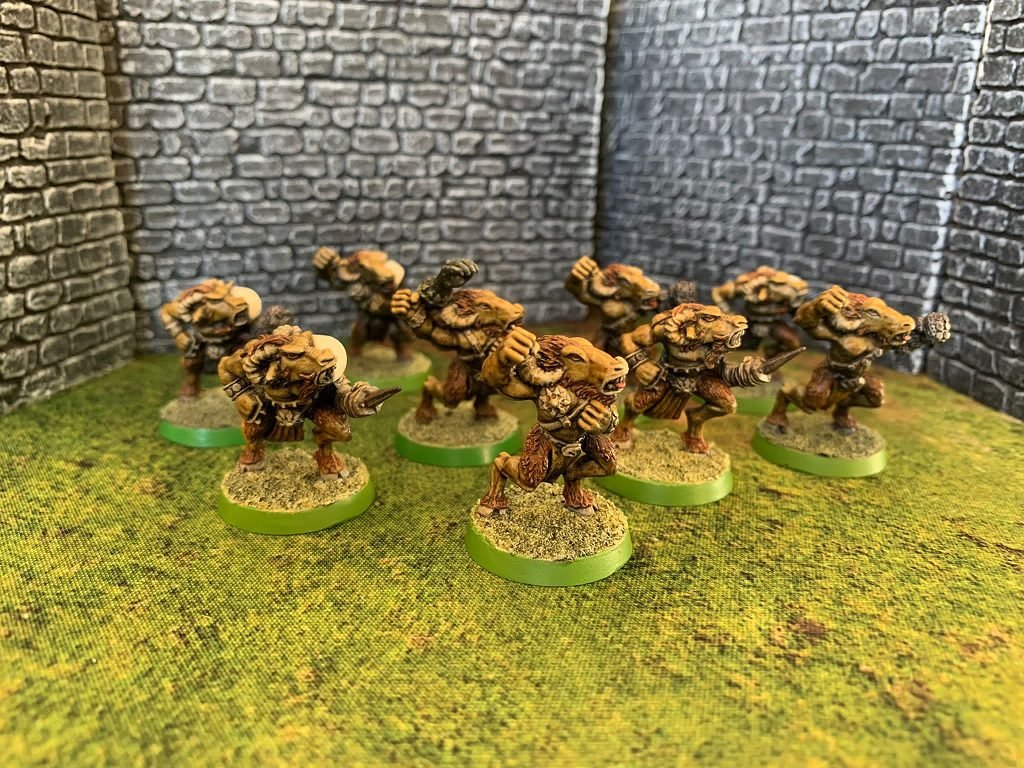
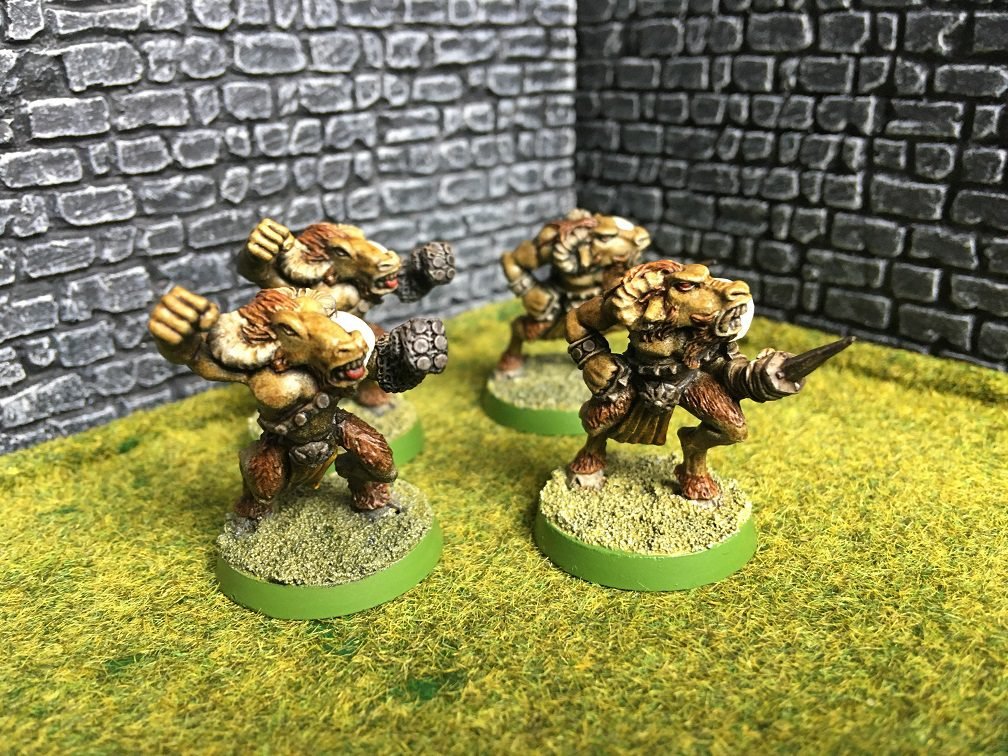
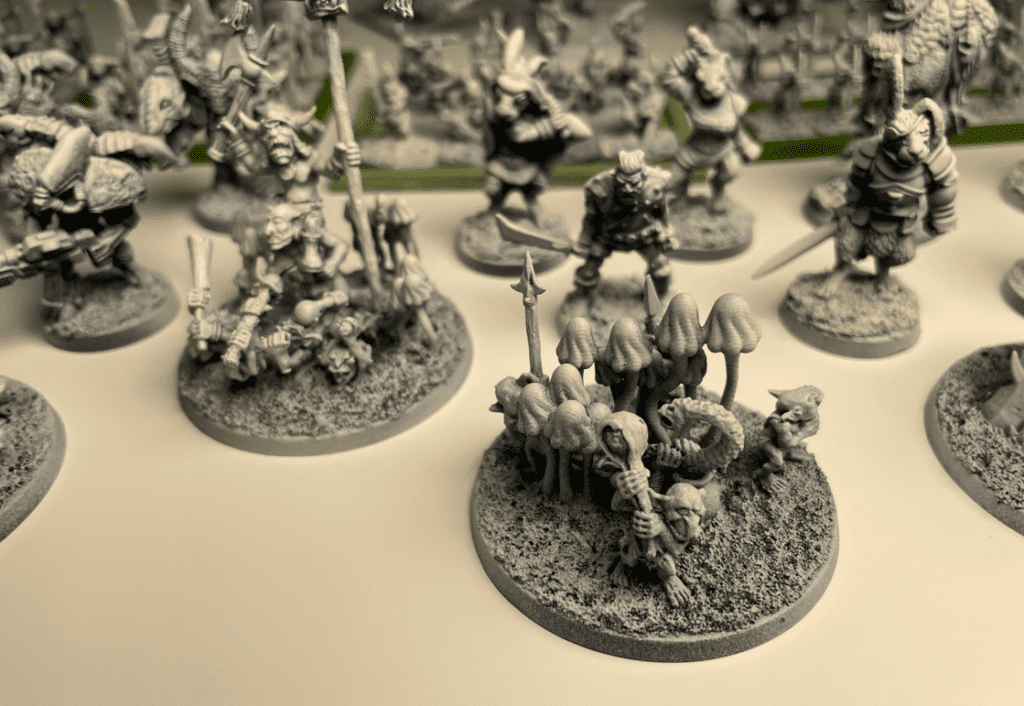
I got a set of Crooked Dice’s definitely-not-Thundercat miniatures for my Christmas and have really enjoyed painting them up.
My four-year-old daughter is obsessed with the series right now. I have a DVD boxed set of the original 1980s series, and she loves it. It was my favourite show back in the mists of time, too, so I’ve tried to do a decent job with these guys.
And it wouldn’t be the Thundercats without this guy.
Yup, it’s Mister “Next Time” himself, Mumm-Ra the Ever-Living.
And (somewhat grudgingly) backing him up are the Mutants from the planet Plun-Darr – Jackalman, Vultureman, Slithe, and Monkian.
These are mainly original models from my 3rd edition set back in the 90s with the exception of a couple of star players.
‘Wullie’ is a converted Wargames Foundry pict, and the big tanky lad whom I’ve named ‘The Gaffer’ is from an even earlier edition of Blood Bowl. Big thanks to Ed in our Discord community for very kindly sending him to me.
I’ve been playing a mini-league with the good lady, and these guys have been dominant so far. They beat Real MovChaos 3-0, then followed it up with a 2-1 victory over Wimblegnome.
Wullie scored four of the touchdowns so far, and he’s certainly catching the eye of fans and opposition players alike.
Thrower Chuck (the other is called Chuck’s brother) and catcher Hans (the other is called Hans’ brother) have been integral in these matches, too. The lads will get a rest and a few beers now, as the next game is between Real MovChaos and AFC Wimblegnome.
This year, I got back into Blood Bowl after a 30-year hiatus. I even bought a modern Games Workshop kit to build my AFC Wimbelgnome side.
Of course, they needed some worthy opposition, so here are their bitter rivals – Real Movchaos.
I actually owned the Chaos All Stars in the 90s, including star player Lord Borak. But only the beastmen survived the great hobby hiatus. I painted those up back in 2021.
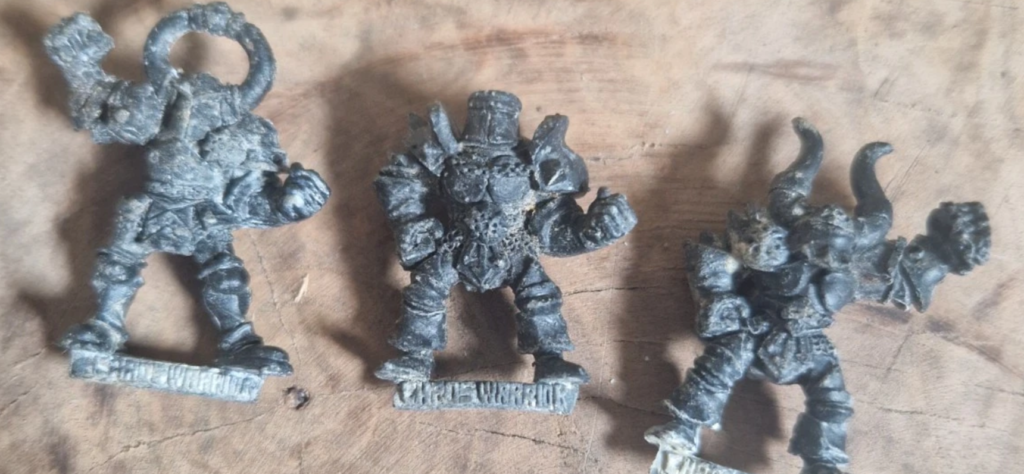
Those gave me a great basis for a squad, but I wanted to add the Chaos Warrior players to the roster.
I picked these guys up on Ebay, but they were in pretty bad nick. Fortunately, I managed to get them cleaned up and painted, and I’m quite happy with the outcome.
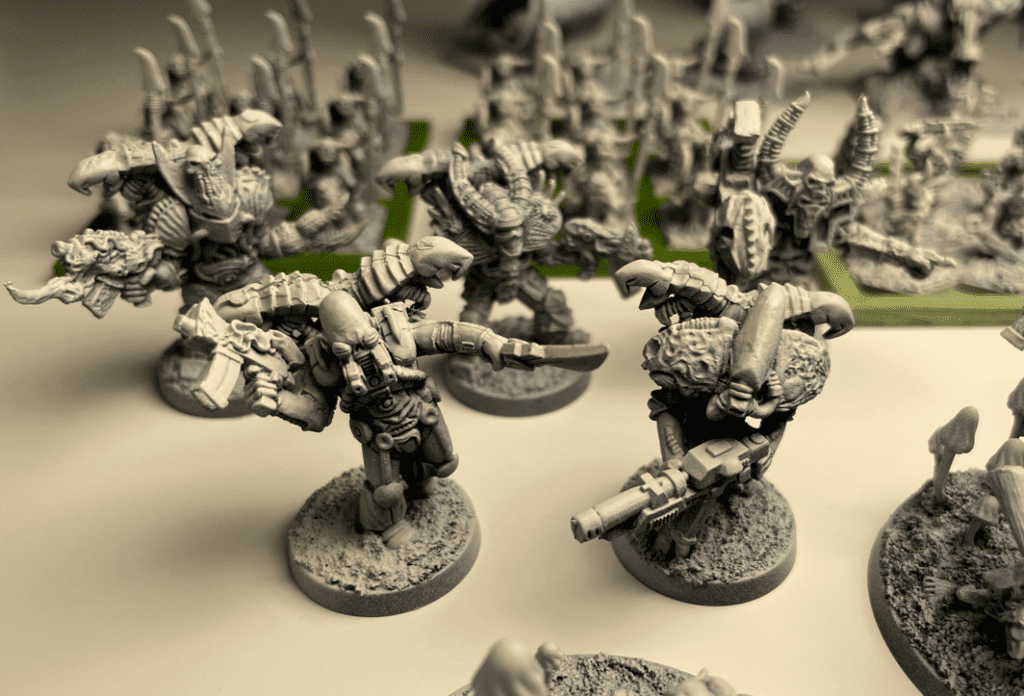
Bilerot Vomitflesh Signs For Real Movchaos!
Huge thanks to Ed in the Bedroom Battlefields community for sending this guy down from the Chaos Wastes. He makes a great addition to the squad!
When I started collecting in 15mm I told myself I’d be happy with two armies (good guys and bad guys), but there’s a real temptation to build out a Nurgle-Chaos force now.
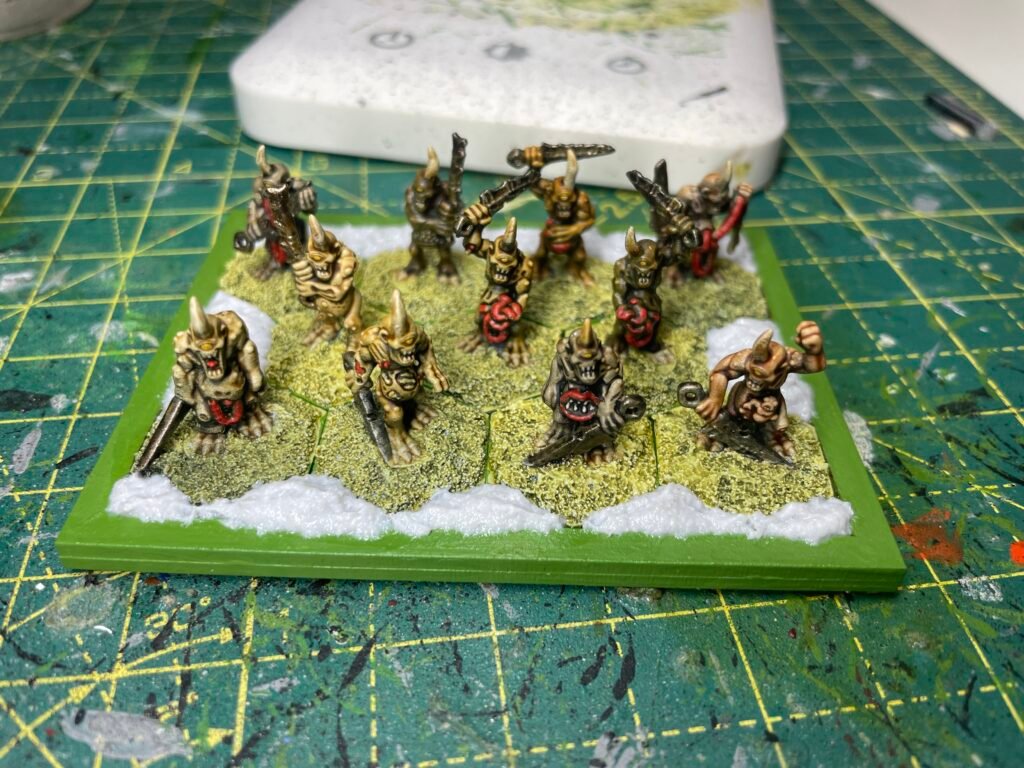
My two almost completed armies are humans/dwarfs and orcs and goblins. The greenskins have some Chaos Warrior allies, and I now have a unit of 15mm plaguebearers in my collection.
I bought these on Etsy shortly after a member of our Discord community (thanks Dave!) very kindly offered to sell me a classic Great Unclean One miniature at a very generous price. I’d mentioned on the podcast that this was my all-time sought-after miniature, and after getting him through the post, it became apparent he’d work really well in 15mm scale.
So back to the 15mm plaguebearers, and these are fantastic little models printed to a very good quality. I’m no expert on 3D printing, but they don’t feel very fragile or breakable, either.
I had a rogue movement tray from Warbases because, in my infinite wisdom, I’d given them the wrong measurements on a past custom order. I also had some MDF hex bases I’d been using to playtest a little pen-and-paper game.
Glueing the plaguebearers to the hex bases worked well, enabling me to get 11 of them in a unit, and giving them more of a “mob” aesthetic, rather than being ranked up.
Continuing on the “no uniformity” theme, I used as many different contrast paints as I could on them.
Then, I used my ground texture to fill in the edges of the movement tray.
So there you are, my petite plaguebearers. I’m pretty chuffed with how they turned out, given that I didn’t really do that much to them. I suppose that’s a benefit of choosing Nurgle miniatures, and maybe a big reason why I might be in the market for more in this scale!
I’ve been looking to up my collection of plastic sci-fi miniatures for games of Star Squabble. As much as plastic isn’t my favourite medium for miniatures, I certainly feel a lot more relaxed when playing with them. Paint on plastic is virtually unchippable.
My first purchase was a squad of classic Space Rangers, sold by eM4 Miniatures for the incredible price of £4.99.
My pal had a few of these when we were younger, and I remember they integrated into our games of Space Hulk and 2nd ed 40k seamlessly. They’re a little soft on details compared to what’s out there nowadays, but for less than a fiver, who’s going to complain?
As I said, I’m not usually a big fan of plastics, and clipping sprues isn’t an aspect of the hobby that ranks high on my list, but this was a great kit to work with. There was just enough variety without it becoming fiddly and annoying.
At £22, these models aren’t too far off a pound a piece either – you can build 20 of them with the contents of the box.
So these guys, combined with my Aliens xenomorphs, give me lots of options for fully plastic games, and my precious metal guys can watch on from the safety of the display cabinet.
By the way, if you’d like to try the aforementioned Star Squabble, I’ve made a fledgling rules sheet available. I appreciate all and any feedback on your playing experience, as well as any tips and suggestions for streamlining and improving the game!
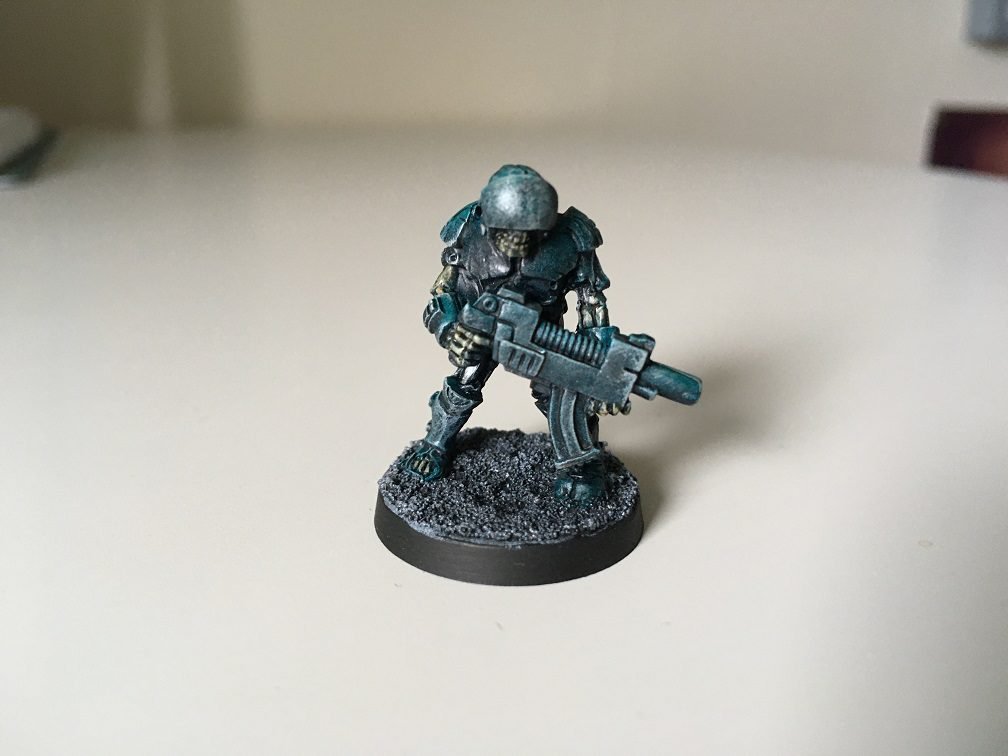
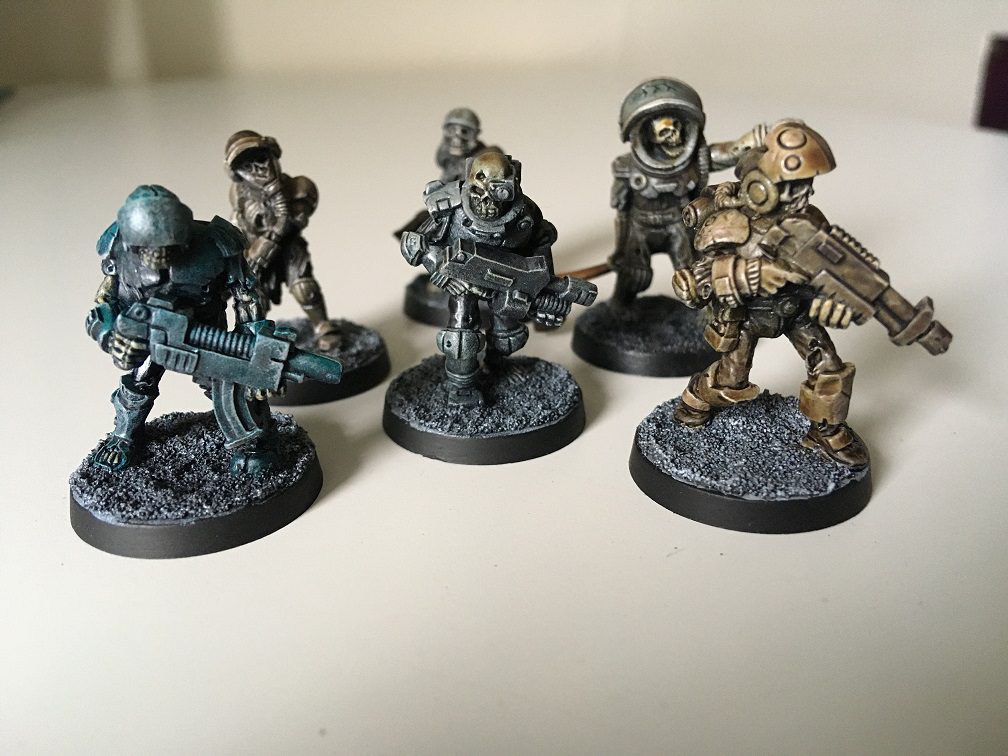
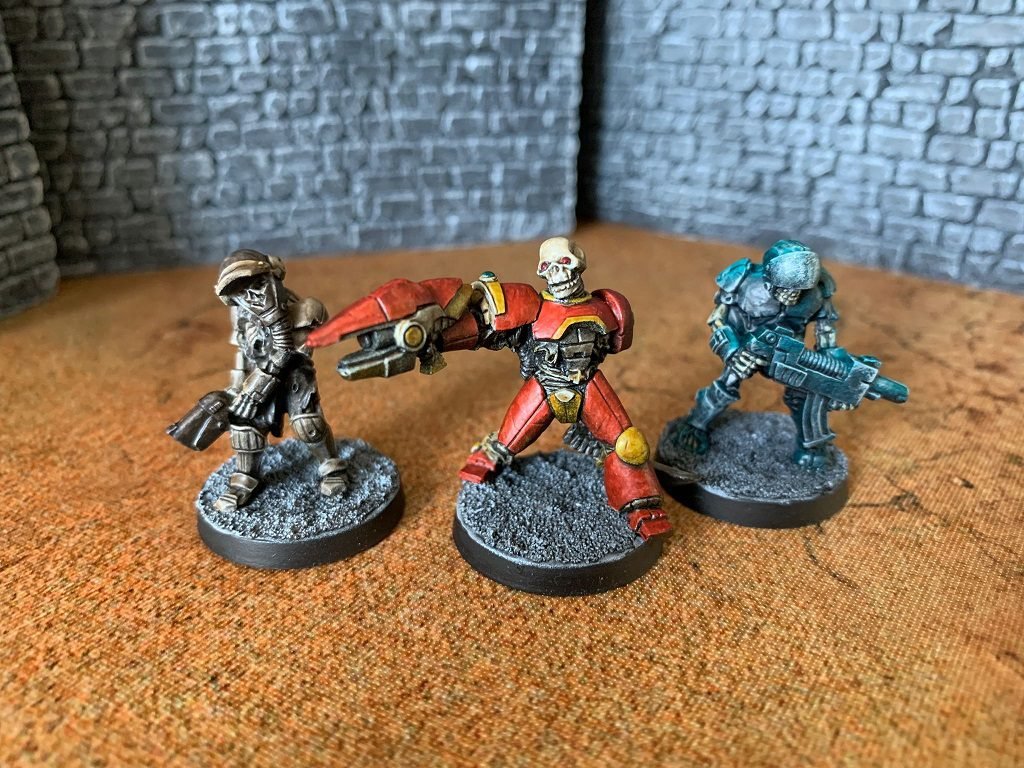
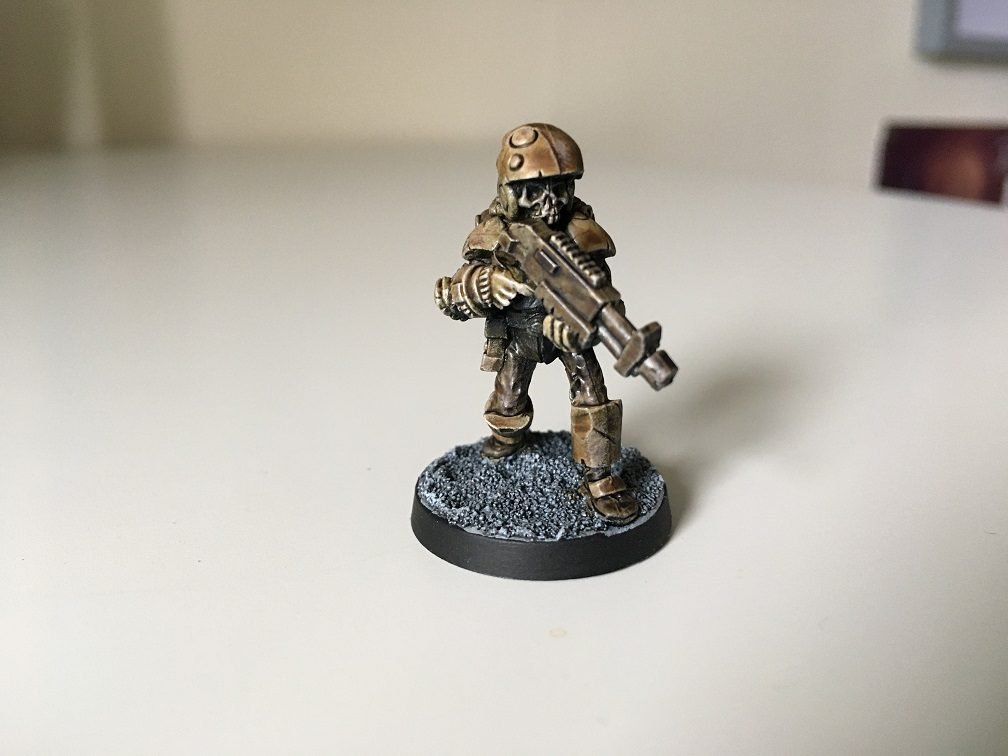
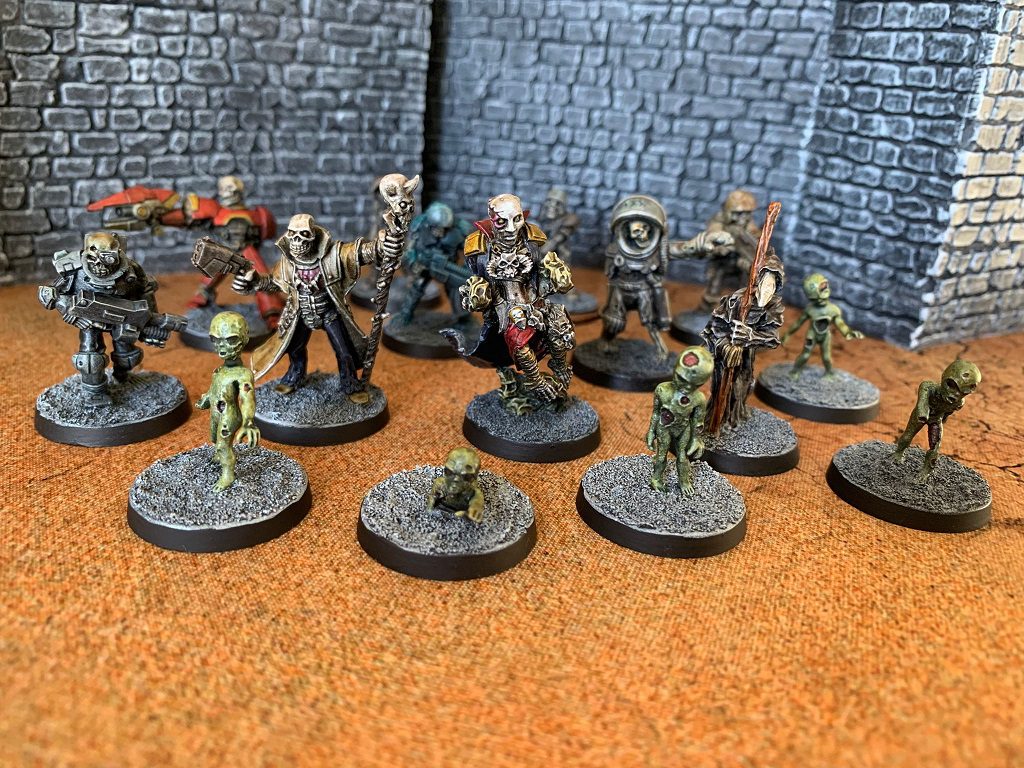
I’ve been building and painting this undead sci-fi warband on and off for the past three years. It was initially intended for Stargrave, but it’ll fit in well with any other ruleset, too, from Planet 28 to my very own Star Squabble.
I liked the idea of a “crew” that didn’t need to be kept safe, fed, watered, and essentially transported around the galaxy. The leadership would simply arrive at the location of their next objective and re-animate the corpses of whatever last happened to die there.
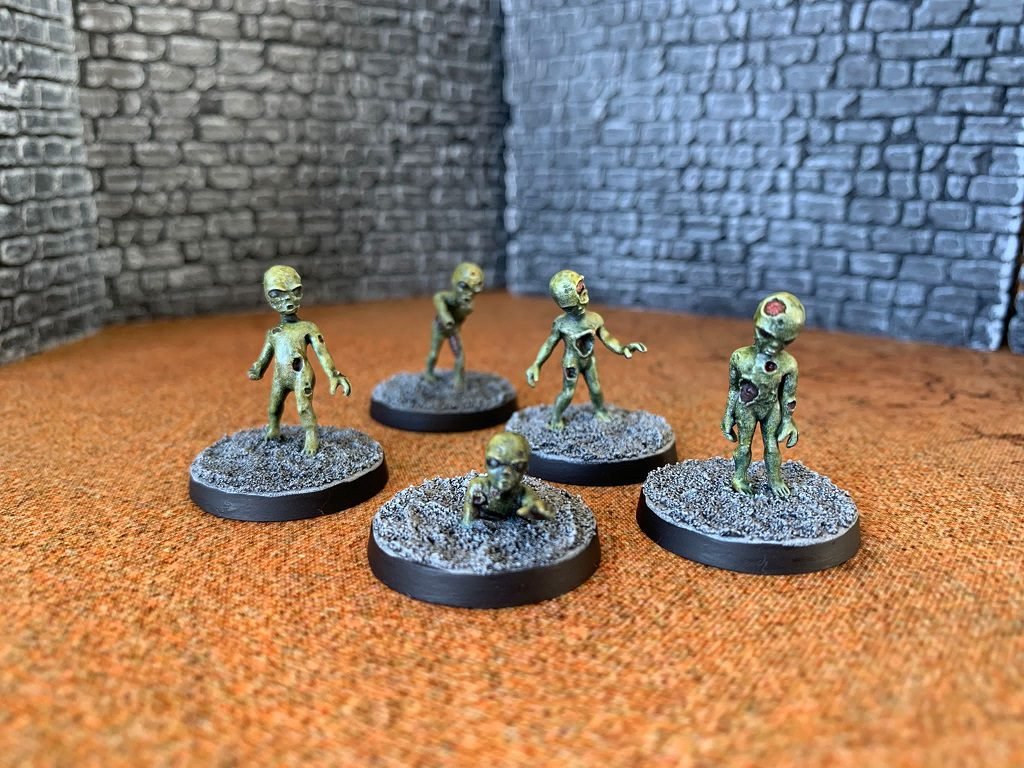
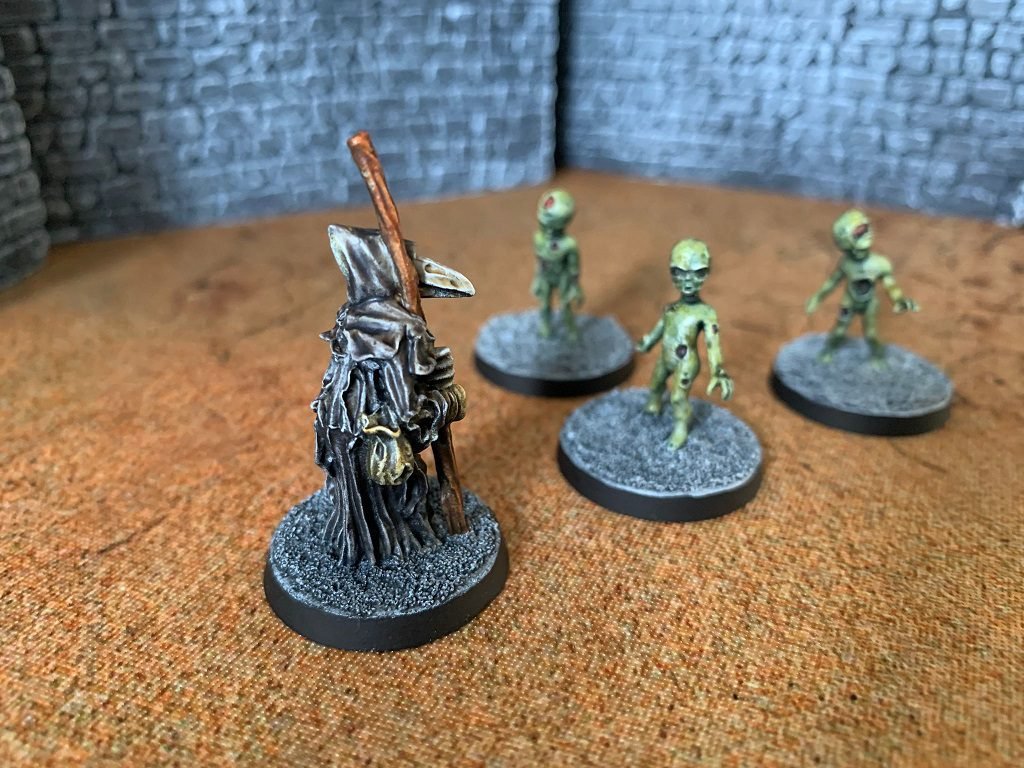
These little undead aliens by Checkpoint Miniatures can be used under the ‘Guard Dog’ category.
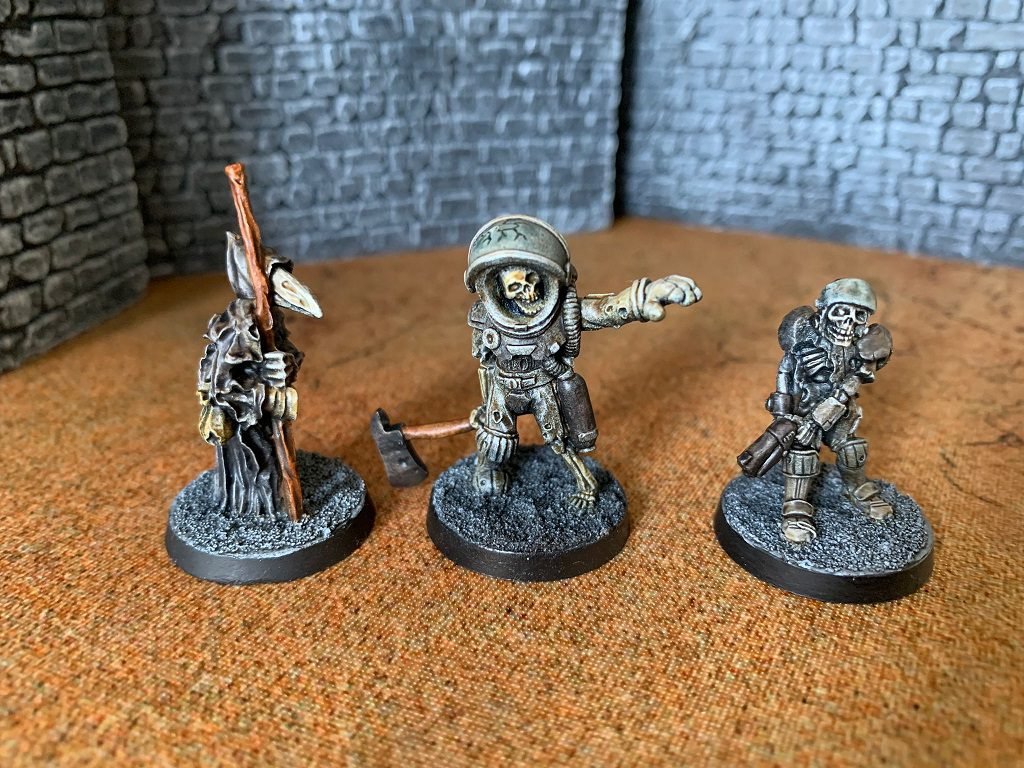
Midlam‘s great Crow Shaman miniature will make an ideal “medic” for the crew. Not a medic in the conventional sense perhaps, just someone with a bit of necromantic magic know-how who can patch up skeletons when they get blasted to bits.
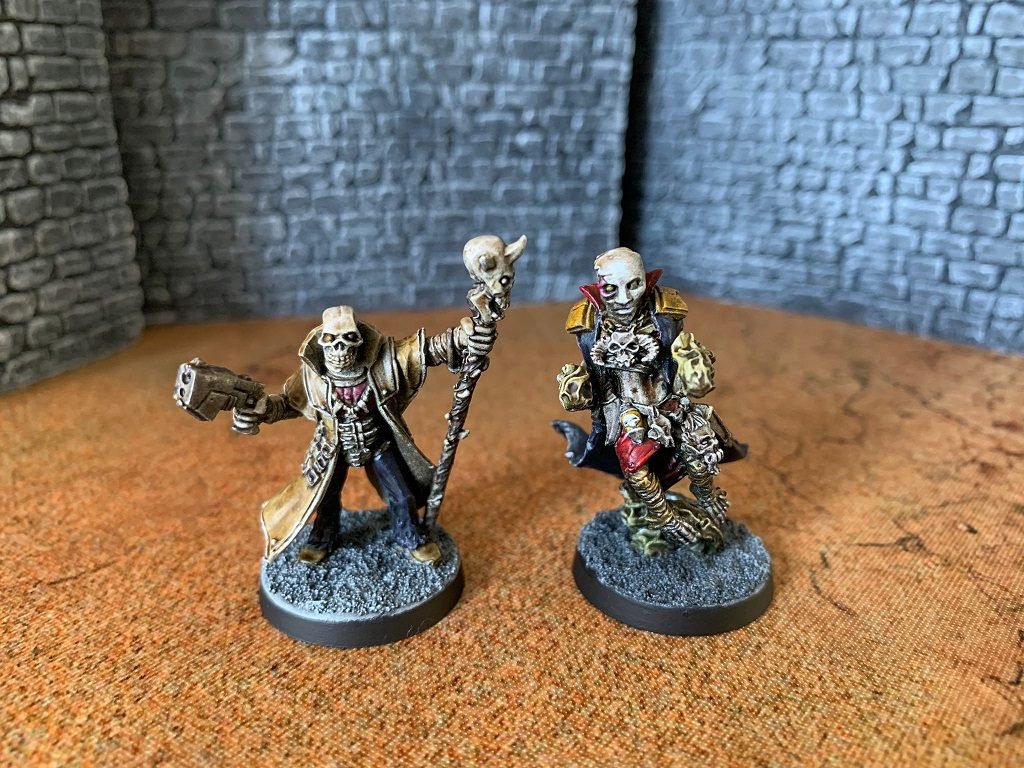
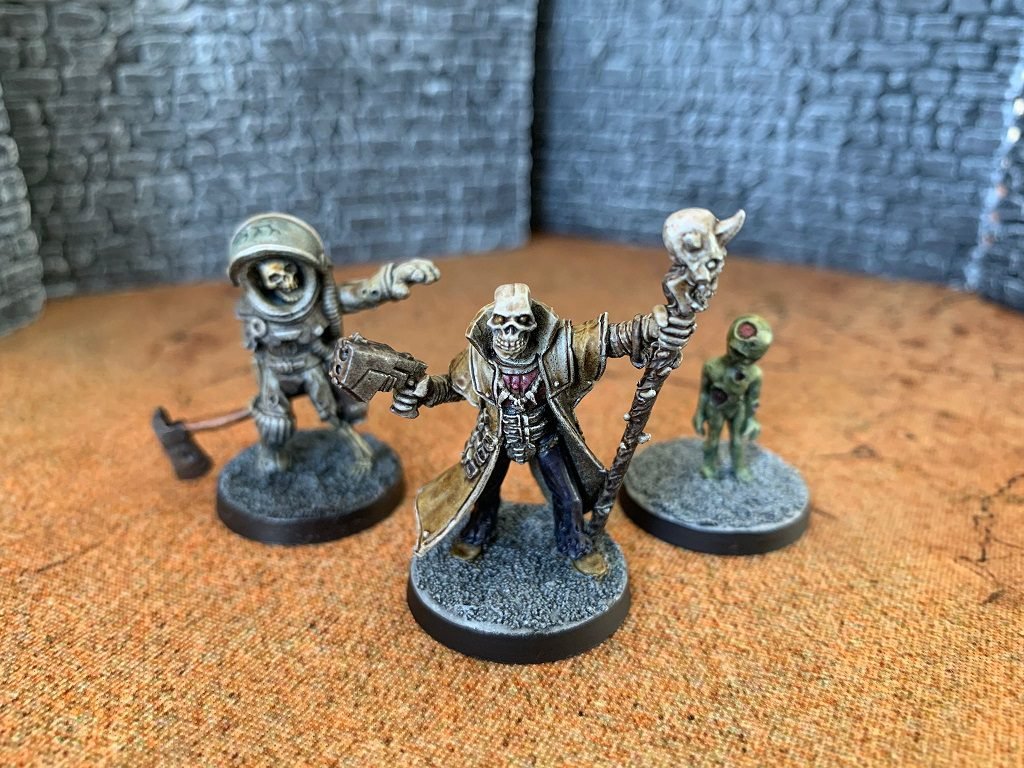
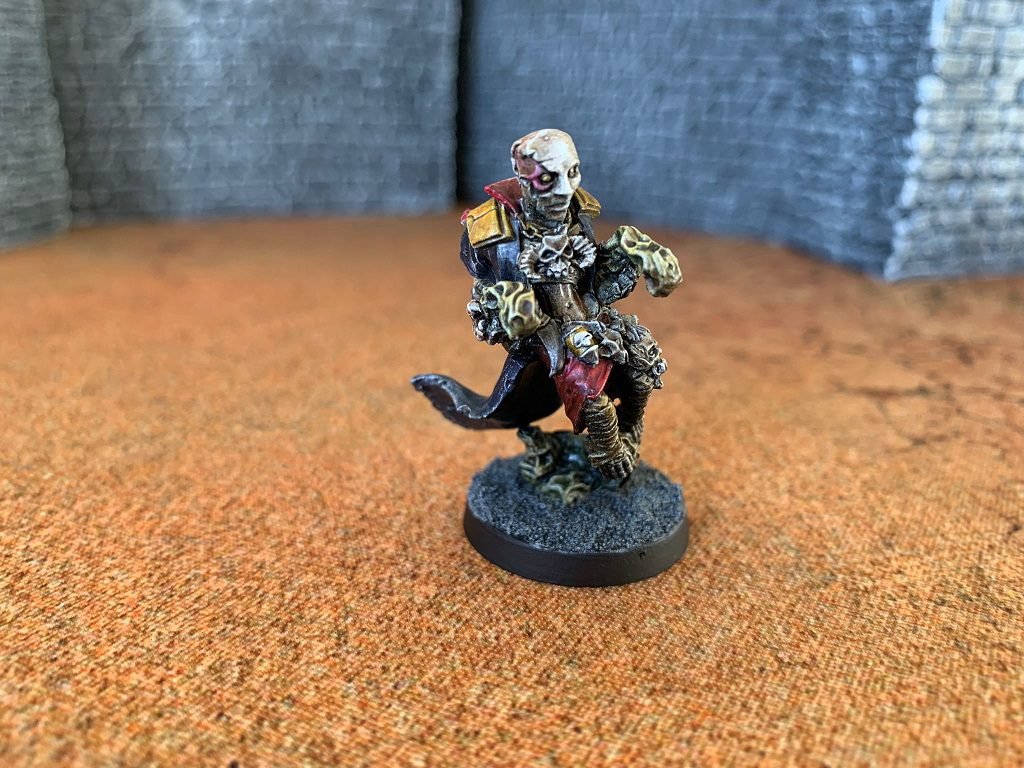
The Captain and Vice-Captain of the crew are Chaos Villain Skully and Kane the Tech Mancer, both courtesy of Diehard.
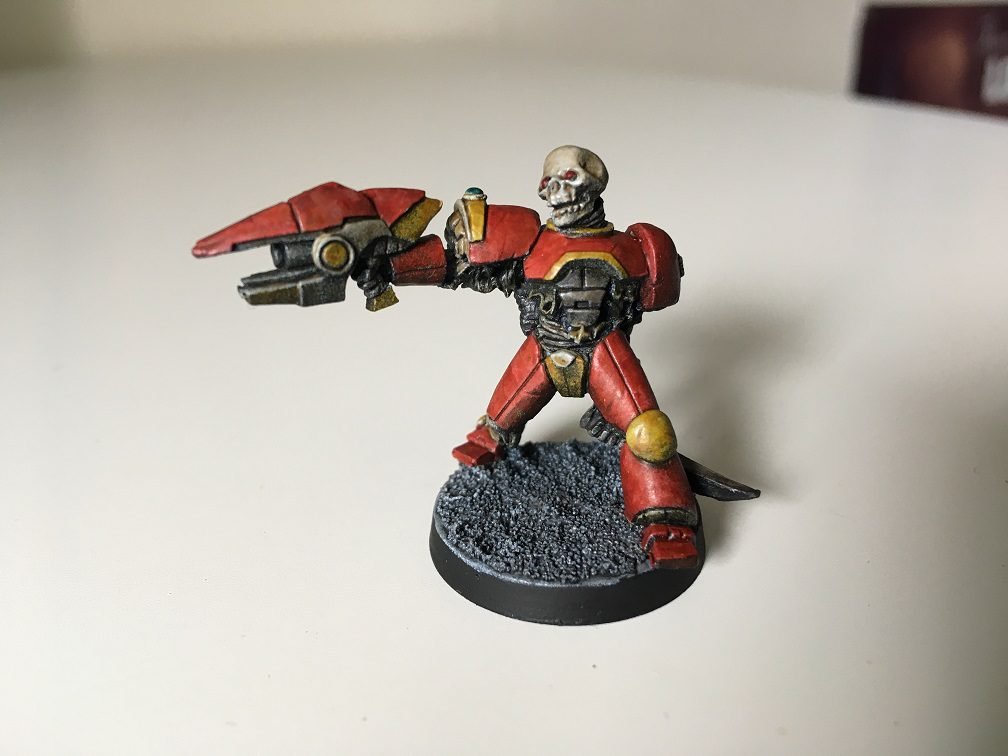
An ex-Blood Angel, perhaps? He can be deployed in Stargrave in the ‘Armoured Trooper’ category.
This post was initially published in August 2023. At that point, every single miniature was in its shiny metal form. Now that a decent amount of them have been painted, I thought it was time for an update.
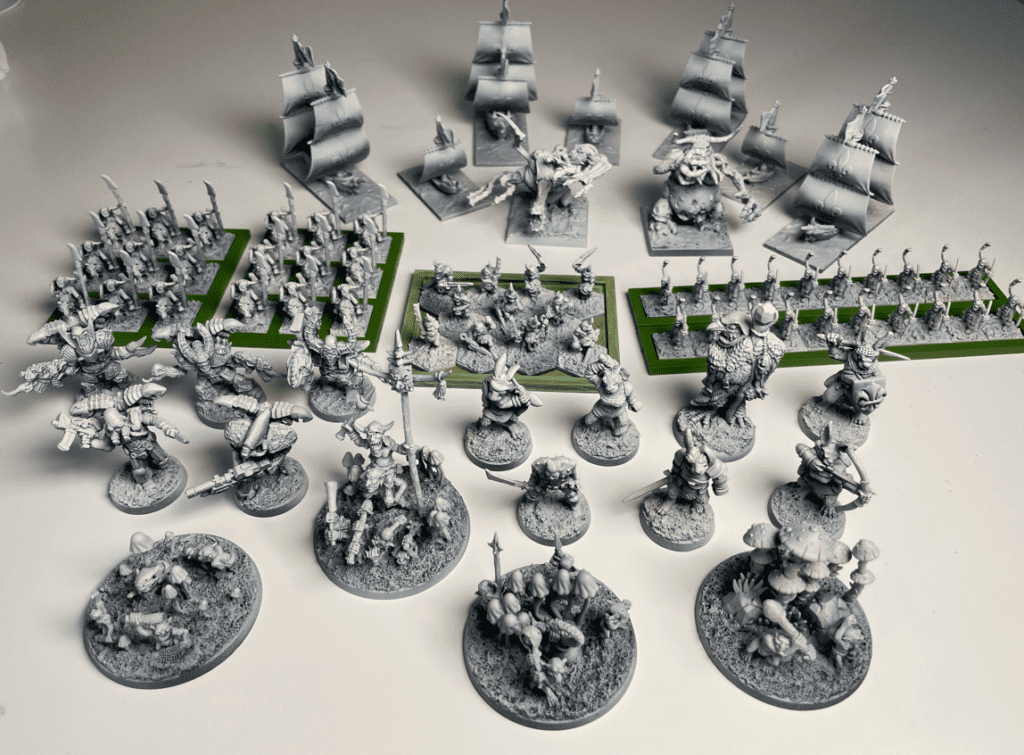
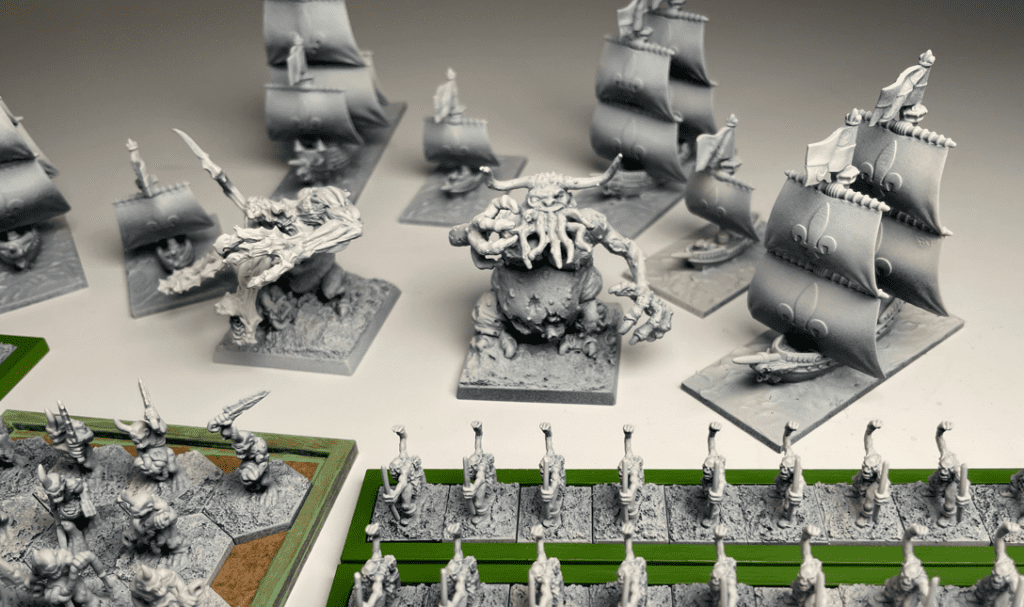
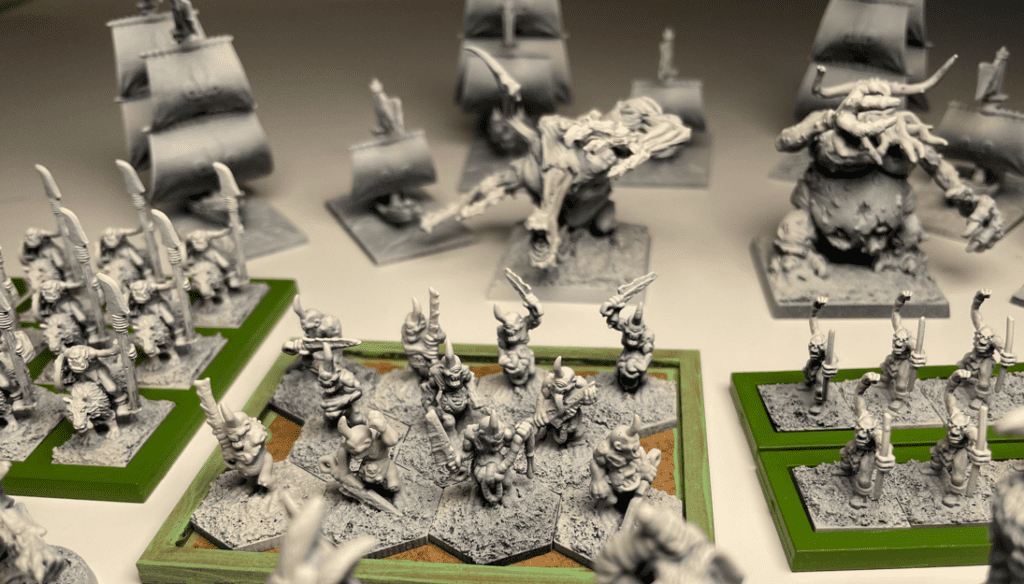
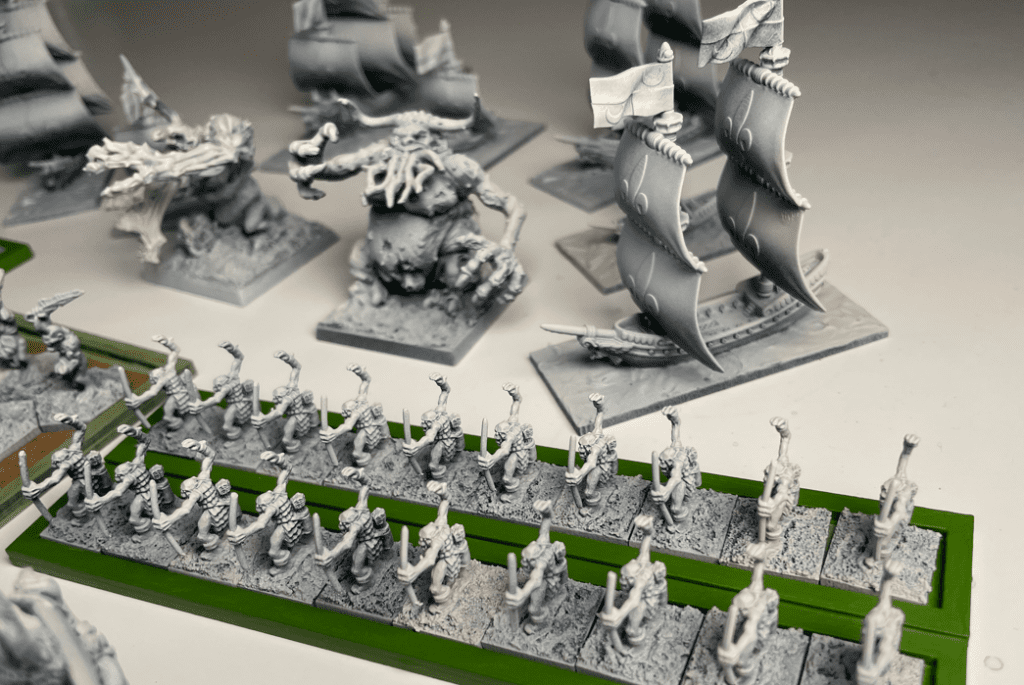
I’m never going to own a 6’4 table. But I still look at those old Warhammer Fantasy Battles pictures in White Dwarf and want to recreate the experience in my own way. 6mm is unarguably a brilliant way to fight out massive battles, but when I learned more about 15mm last year, it felt just right. Not too big, not too small, just right.
To be clear, I’m not abandoning 28mm. It’ll always be the main scale for me. But doing mass battles at that scale is unrealistic for me. I just don’t have the space, or, the budget.
I did have some hobby money available after selling a few 28mm regiments I knew I’d never use. So I re-invested it in two full 15mm armies, which I was able to assemble for around £120 in total.
One is an Orc & Goblin horde (with some Chaos Warrior allies), whilst the other is an Empire/human force. I put them together from three different companies, Ral Partha, Alternative Armies, and Pendraken.